Important: This article is for informational purposes only. Please read our full disclaimer for more details.
Many Diabetes patients enroll for Yoga classes to help them manage the situation. However, very few know about the kind of Yoga practices they should sign up for. This article will help you understand the best Yoga poses to practice in order to keep in check your body glucose levels, improve blood flow and general management of the diabetes condition. Just go on reading this through to the end.
10 Best Yoga Asanas for Diabetes
1. Seated Forward Bend
It is also known as the Paschimottanasana pose. It is a common but classic Yoga pose that gives a good stretch to your body right from behind your thighs up to your spine.
How to do:
- Sit on a doubled mat while stretching your legs straight in front of you
- Put a support pro under your knees to make you a bit more comfortable
- Let your soles point straight up in such a way that the toes are leaning towards the shins.
- Still seated, inhale and then straighten up your spine as you gently open up your heart centre.
- Let your breath out while hinging at your hips and lean forward.
- Bring your legs towards your feet as though your stomach and your thighs are coming to contact. Reach a comfortable pose and let your chest be folded into your legs.
- Rest your chin over your chest
Benefits:
- This pose will help you to helps you cut extra weight.
- During this pose, the erector muscles, gluteus maximus and the pelvic muscles all work out to help you feel relieved.
- It is a therapeutic pose that will help reduce the blood pressure and cast anxiety and general fatigue away.
[ Read: Yoga Poses for Weight Loss ]
2. Supported Shoulder Stand
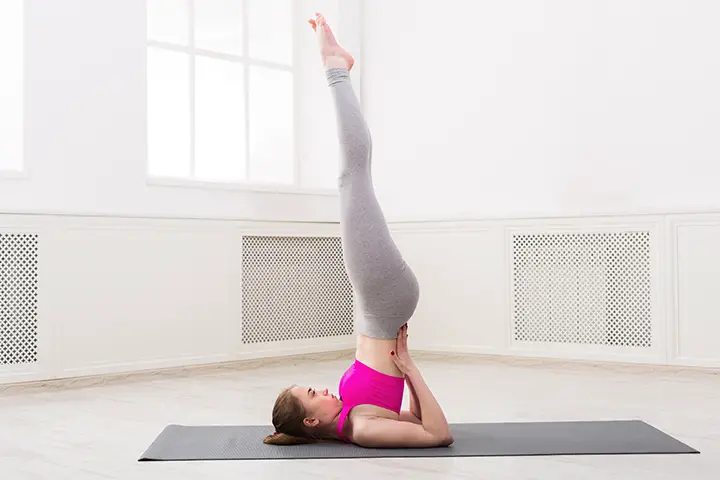
It is also called the Salamba Sarvangasana. This is a powerful pose that works various muscles like the trapezius, rotator cuff and the rectus abdominis. It is an inverted-kind-of a pose where the body rests on a support, mostly a folded blanket.
How to do:
- Lay prostrate on a level ground and place a folded blanket under your shoulders so that the shoulders rest on it.
- Put your shoulders parallel to the blanket edges
- Align your arms along your body and let the back of your arms face down (palm should face up)
- Raise your legs up in the air. Keep them straight.
- Bring the legs towards the head gently still keeping them straight.
- Let your hands provide support by putting them on the lower back level with the fingers facing up.
- Lift up your legs now and make sure that you align the shoulders, hips and the spine all in a straight line position
- Maintain this pose for half a minute up to 3 minutes
- Gently release your spine down to the blanket followed by your legs and finally release your arms back to their first position (along your body)
Benefits:
- This Yoga pose is well known to improve blood circulation, stimulate the thyroid gland.
- In addition, it also helps reduce stress levels and keeps your mind calm and serene.
[ Read: Yoga for Osteoporosis ]
3. Plow Pose
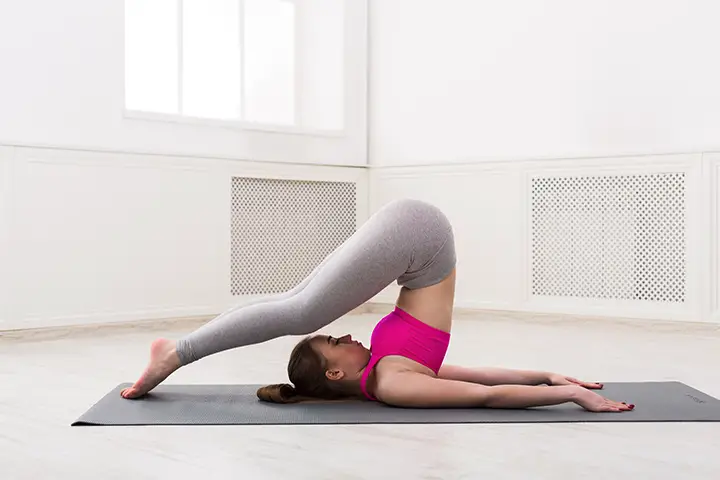
This is a famous therapeutic Yoga pose, also known as the Halasana pose.It involves twisting your body like a pretzel to stretch your spine and calm your mind.The muscles worked here include the rotator cuff, trapezius, hamstrings and the spinal extensors.Many people find it easier to get into a plow pose from a shoulder-stand position.
How to do:
- Go to a shoulder-stand pose, then let your legs come above your head headed towards the floor
- Use a support like a pillow or a folded up blanket to help your legs reach the floor (in case you can’t get to the floor)
- Add extra support by bringing your hands to the lower back.
- Maintain this position for at least 1 minute and a maximum of 5 minutes.
- After this, release by lowering your spine over the mat, keeping your legs straight up at a right angle.
- Finally bring your legs down to the floor and release your arms to rest.
Benefits:
- This pose brings about the much needed therapeutic effects that help to ease backache, insomnia and headaches.
- It also calms the mind and keeps your spine stretched.
[ Read: Yoga for Ankylosing Spondylitis ]
4. Upward Facing Dog
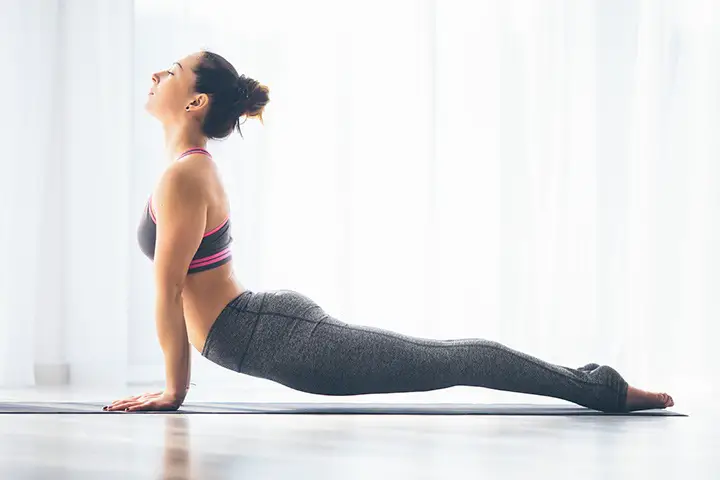
The Urdha Mukha Svanasana pose is its original name. It’s a pose where you give your upper body a powerful backbend. A lot of muscle strength is required for this, but it help you a great deal when it comes to the benefits.
How to do:
- Lie down on a mat with your stomach facing down and your legs straight behind you.
- Put your palms down next to the chest area such that the forearms are perpendicular to the floor (as though you want to do a push-up).
- Push up your arms to lift your upper body and the legs at the same time.
- Press the top of your feet against the floor to lift your legs too.
- Slightly bend your elbows while letting your abdominal muscles work along with the arms and thighs.
- Keep your butt and shoulder blades tight while maintaining a straight-head gaze.
[ Read: Yoga for Sciatica Pain ]
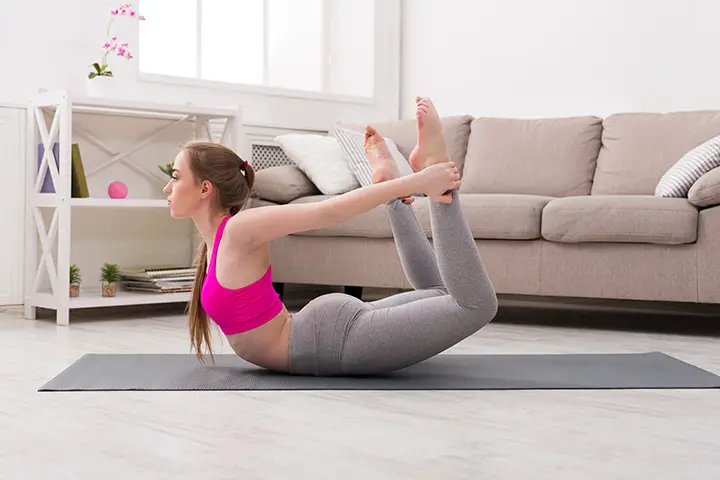
5. Bow Pose
This is a back-bend pose that involves casting your body into a bowl-shape, opening up the chest and exciting the internal organs. It works out the hamstrings muscles, the quadriceps, pectoralis major and the gluteus maximus.
How to do:
- Go down on your belly.
- Let your arms lay alongside the trunk while keeping your palms up.
- Fold up your knees and place your hands beside your ankles on the outer side.
- Raise you head, the chest together with the legs, all simultaneously.
- Inhale deeply and maintain a straight-forward gaze.
- Stay in this posture for a maximum of 30 seconds
- Breathe out slowly as you drop from this pose.
- Clasp your palms together and put your arms under your forehead to pillow it.
- Shake your hips sideways in order to ease your back.
- Repeat these steps once more or twice
Benefits:
- The bow pose stimulates the internal organs to enhance proper blood circulation.
- It gets rid of constipation and keeps you from respiratory complications. It is also known to reduce the blood glucose levels.
[ Read: Yoga for Thyroid Problem ]
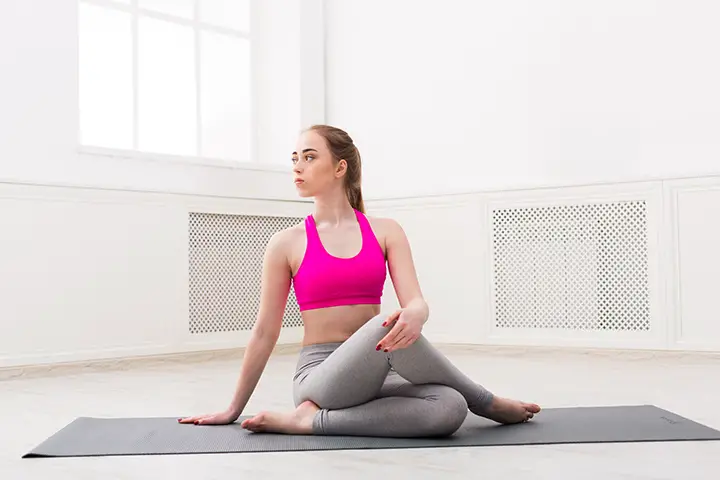
6. Ardha Matsyendrasana
It is commonly known as the Half Lord of the Fishes pose. It is a twisting pose that gives energy to the spine and increases your digestive power.
How to do:
- Sit on a mat and cross your legs, then dash your right leg outwards of the left hip.
- Breathe in and twist your body to the inside of the left thigh.
- Place your left hand on the floor right behind you.
- Let the upper part of your right arm be outside your left thigh and then lift your forearm into the air.
- During breathing in, maintain the stretch and the lifting.
- Exhale while twisting more into the right side.
- Turn your gaze over the other shoulder.
- Maintain this posture for one minute.
- Repeat this pose using the other side.
[ Read: Yoga Poses to Reduce Belly Fat ]
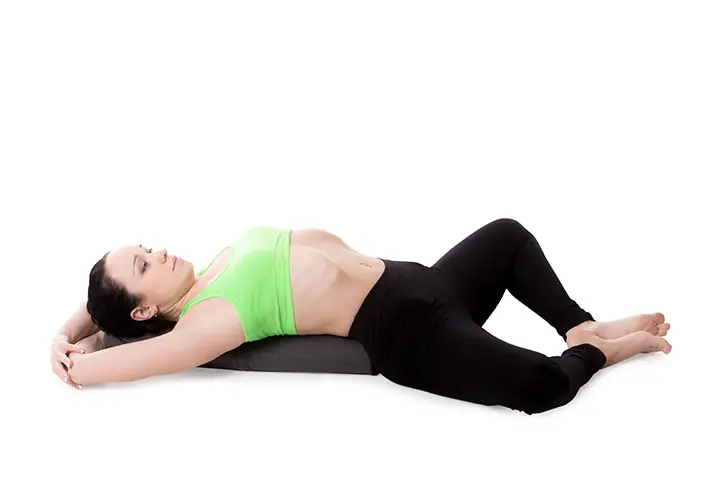
7. Supine Spinal Twist
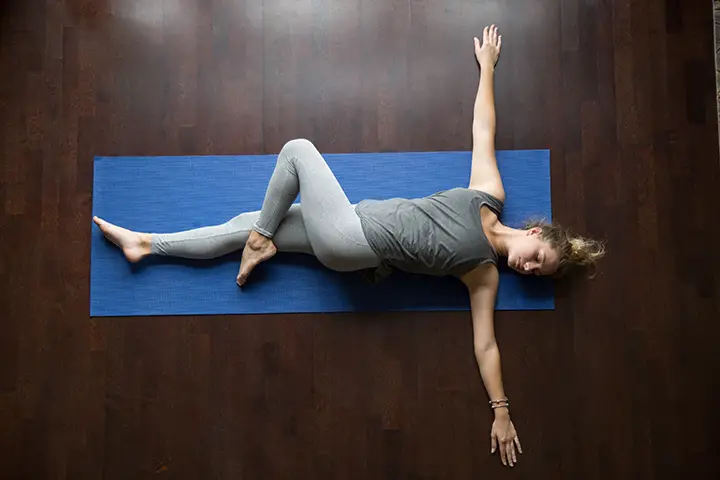
This is a reclining twist that aims at energy restoration and stimulating the internal organs. It involves working out the rectus abdominis muscles, the trapezius, pectoralis major and the erectors spinae.
How to do:
- Lie on your back and raise the knees to the chest position
- Draw your arms to the sides and place your palms facing up.
- While still folding the knees now at the hip level, bring them to the left side.
- You may put some little pressure to your knees using the left hand.
- Maintain this pose for not less than 30 seconds
- Do this again now on the opposite side
8. Reclining Bound Angle Pose
It is also called the supta baddha konasana posture. This soothing pose is most suitable for groin and pelvic muscle resistance. Let’s see how it works:
How to do:
- Sit on a mat and fold your knees outward as you bring the soles of your feet to face and touch each other.
- Gently lean back to touch the floor using your back.
- Place your hands along the body and ensure the palms are looking up.
- Gently press in on your thighs to give your legs and hips a deep stretch
- Maintain this position to a maximum of 10 minutes.
- Drop of from this pose by lifting using your hands and pressing the knees together and back to a sitting position.
[ Read: Yoga Poses for Abs ]
Benefits:
- It helps to stretch the groin and pelvic muscles to ease up any resistance.
- Its restorative nature helps to get rid of insomnia, depression, stress and their effects.
- Experts recommend this [practice to pregnant women to help boost energy to the pelvic area.
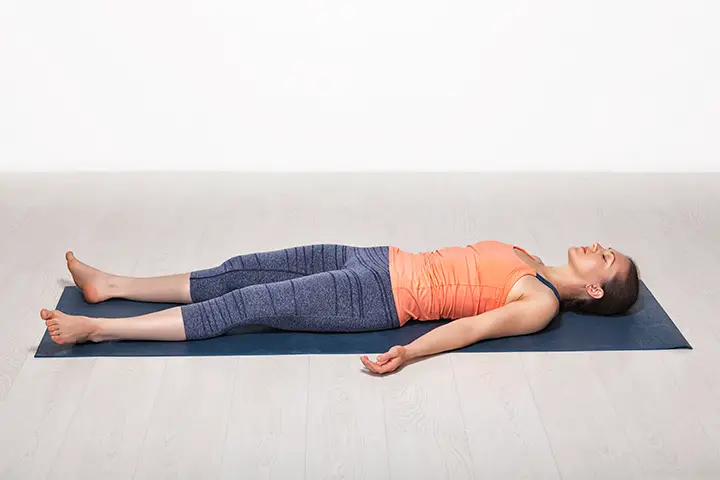
9. Corpse Pose
It is also called the Savasana pose and it is full of relaxation. Though it is challenging, it comes with loads of benefits. It is recommended to be done towards the end of your Yoga exercise.
How to do:
- Lay down on the floor using your back and spread your feet outwards further out of the hip level.
- Align your arms along your body and let both palms face up.
- Straighten your trunk so that the whole body takes a Y figure.
- Press your body gently to thefloor and while you do this, release any tension and be in a 100% relaxing mode.
- Maintain this position for 10 to 20 minutes.Benefits.
- It is known to help still the mind, get rid of the effects of insomnia, fatigue and mild headaches.
- It also reduces the blood glucose levels due to its restorative abilities.
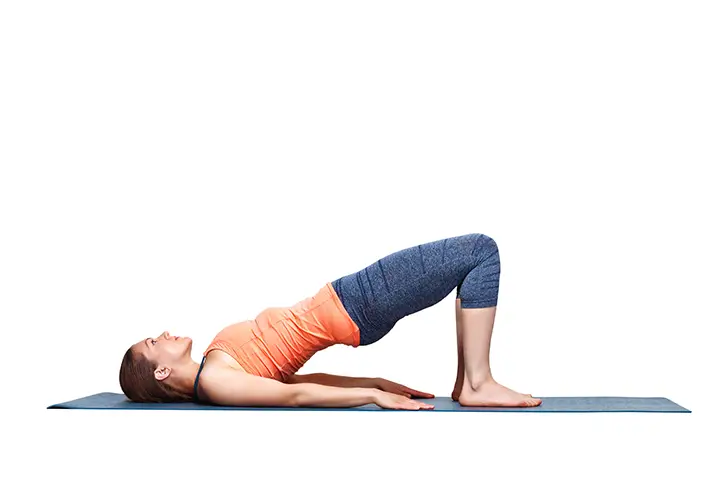
10. Bridge Pose
This is a relaxing and energizing posture that is tailored to open up your upper arms, shoulders and your chest. It enhances spine flexibility and relaxes your mind too.
How to do:
- Lie on your back and place a folded blanket on the floor for support. Knees should be bent with soles touching the floor.
- Breathe out and push your sitting bones upwards keeping a firm butt while keeping your feet and arms on the floor.
- Raise the butt above the floor and keep the knees forward away from the hips. Keep the tailbone lengthened toward the back of the knees.
- Let your elbows be straight and your fingers interwoven under you. Bring your shoulder blades into your upper part of the back aligning it with your neck.
- Raise the chin farther from the sternum and tighten the shoulder-blades against the back. Maintain this pose for about half a minute to one minute.
- Drop off by gently bringing the spine down to the floor exhaling all the way.
Benefits:
- It works out your hamstring and gluteus maximus muscles to strengthen them.
- This pose is a chest and shoulder-opener. It stretches the back, hip and thigh muscles.
- Experts also claim it calms the mind and keeps the spine flexible.
From practicing these Yoga poses, you will realise that your Diabetes management experience will have improved with a great margin. Make Yoga Pose practice more of a regular thing for you and you will reap all the benefits discussed in this article. Whether you prefer to do it on your own or hiring a Yoga couch to help you through this, truth is these Yoga poses will improve your health a great deal. Let’s Yoga Diabetes out of our system.
You Might Also Like:
- Does Apple Cider Vinegar Help with Diabetes?
- Yoga Poses to Increase Breast Size
- Yoga for Thyroid – 7 Best Poses to Control Thyroid
- 8 Yoga Poses to Detox Your Body
- Yoga for PCOS – 6 Effective Poses to Treat PCOS

