Important: This article is for informational purposes only. Please read our full disclaimer for more details.
Do you have a job that demands sitting 8 to 9 hours in front of the laptop? Well, back pain is a common health issue in middle agaed and elderly people but this can even affect anyone in today’s lifestyle. It would not only reduce back pain but also relieve physical and emotional stress. All exercises should be performed not by number and not by time but by the respiratory cycle.
- One breathing cycle includes both Inhale and exhale.
- In each exercise the important thing you need is to breathe and then after you take the right position you shall count the required number of cycles (we advice specific number for each exercise) and then exit the pose.
Article Contains
10 Simple Yoga Poses Helps to Relieve Back Pain
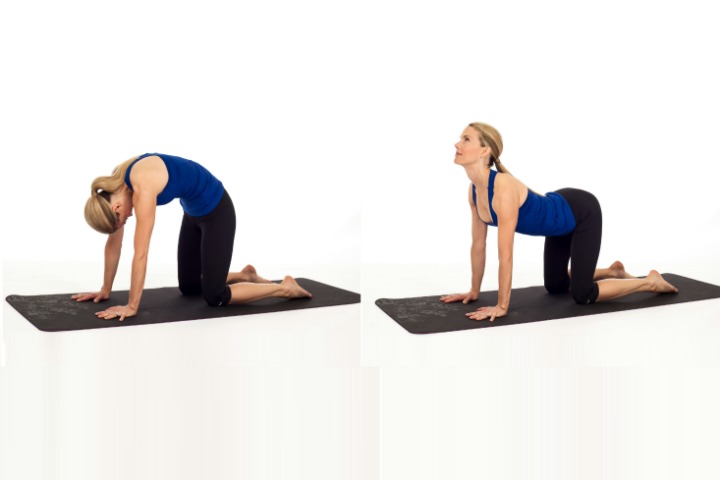
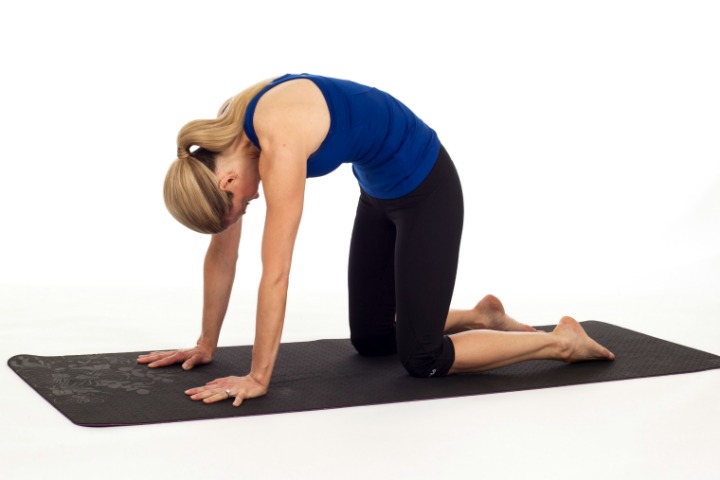
1. Pose “Cat-Cow”
Procedure:
- Stand on your knees and place your hands on the floor.
- Inhale for a while bysighting in forward direction.
- On the exhale turn your back round.
- Lower the head and look down andtake 6-10 breath.
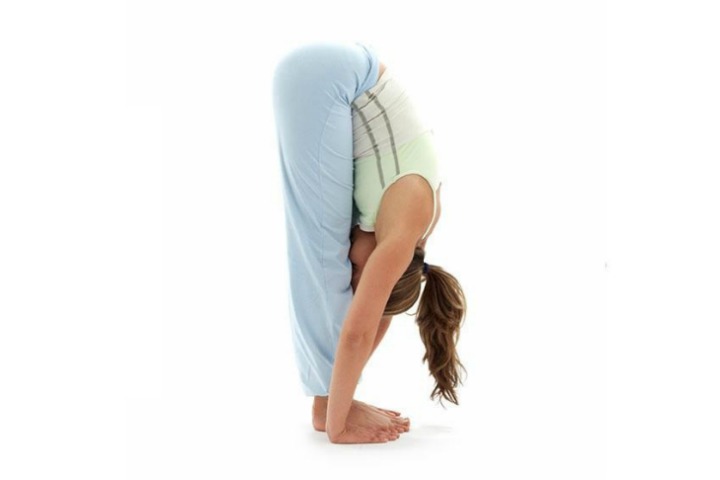
2. “Uttanasana”
Procedure:
- Stand straight by bringing feet together.
- Keeping your legs straight, lean slightly towards front.
- Touch the floor with your hands stretched but do not rely on them.
- Hands only contribute towards the traction back. Then you need to create a straight line with the spine.
- Your body weight must be fully concentrated on heels and take 3-5 breaths.
- You can slightly bend your knees if you cannot make a straight line between your back and arms.
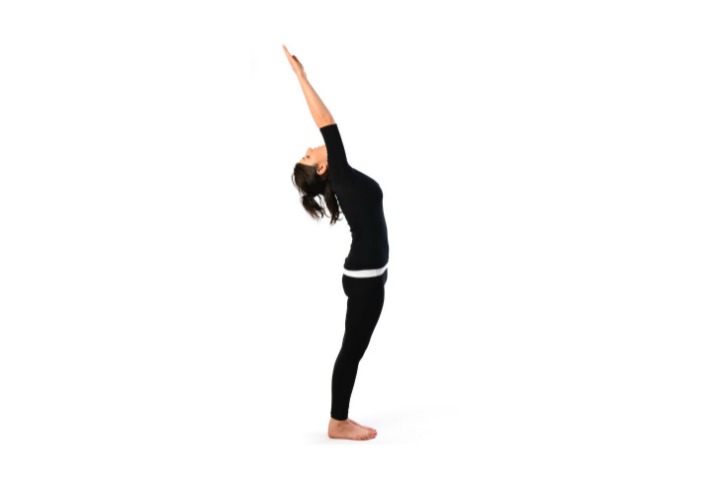
3. “Hasta Uttanasana”
Procedure:
- Stand straight by bringing feet together.
- Slightly raise your hands clasped lift straight above you.
- Tweak your tailbone slightly pointing the sacrum at the floor.
- Place palm over your head to create a continuous traction in the spine.
- If you feel discomfort in your shoulders bend your elbows slightly and bringneck forward, so as to avoid pinching. Take 3-5 breaths.
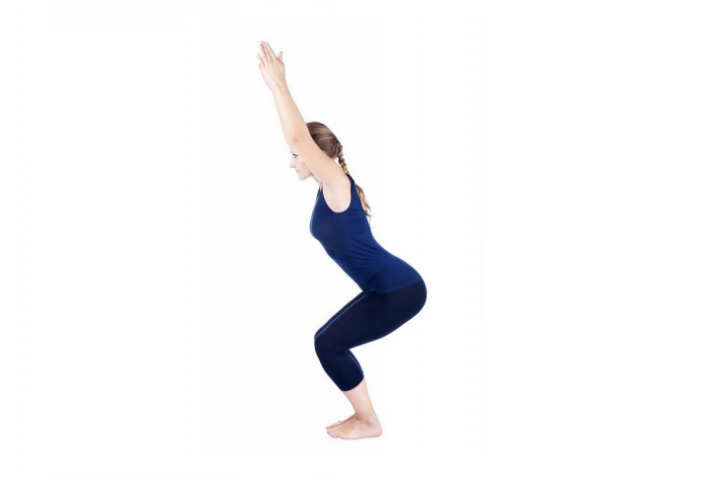
4. “Utkatasana”
Procedure:
- Stand straight with rising feet at hip width.
- Raise your hands up, tweak your tailbone.
- Get down a bit like sit on a chair with knees looking strictly forward.
- Do not lower the hips below the height of knees andtry to find the point of maximum stress.
- Keep your body upright without bending at the waist.
- Lower yourself only with a straight spine.
- Push up your heels.Raise your hands up well. Take 3-5 breaths.
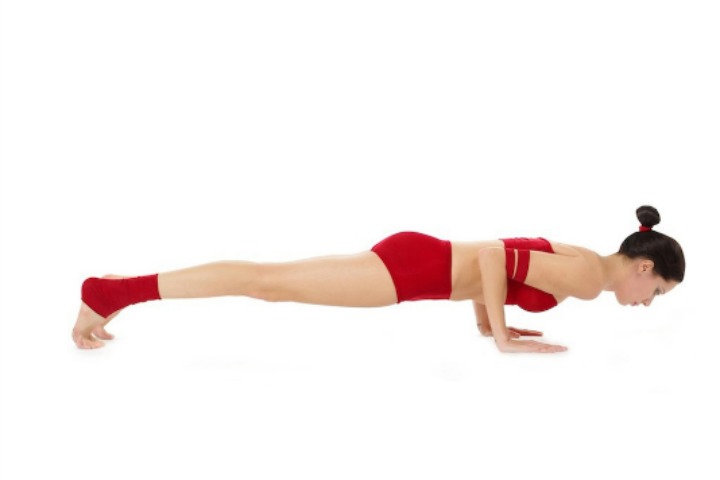
5. Variation “Chaturanga Dandasana”
Procedure:
- Take the plank position on forearms andshoulders strictly perpendicular to the floor.
- Legs must be on the width of the hips.
- The body must be in straight line.Sight of your face must be directed to the floor. Disposed crown forward.
- Tweak your tailbone.Do not bend at the waist. Take 3-5 breaths.
6. Variation “Bidalasana”
Procedure:
- Stand on your both hands and both legs with your feet on rise.
- Slowly lift your knees off from the floor at the same time twist your body back.
- The main problem is area between the shoulder blades should be highest point.
- Lower your hips as low as possible.At the same time your mind should be directed to their feet.
- Knees must be slightly bent. Take 3-5 breaths.
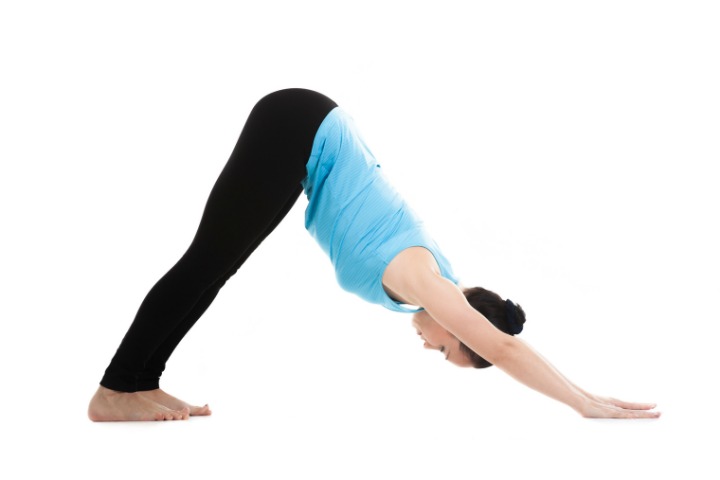
7. Pose “Adho Mukha shvanasana”
Procedure:
- Take position of a bracket with straight arms.
- Now away for pelvis back to bend and bending of knees.Legs pushed upto the width of the hips.
- The heels must be rest on the floor.
- Place your hands and shoulder apart, hands tightly pressed to the floor.The fingers are also kept wide apart.
- Spleen and arms should rest in a straight line.
- If necessary bend your knees.
- Do not pinch the neck and pull your shoulders to touch sides of the neck and lower.
- Take 3-5 breaths.
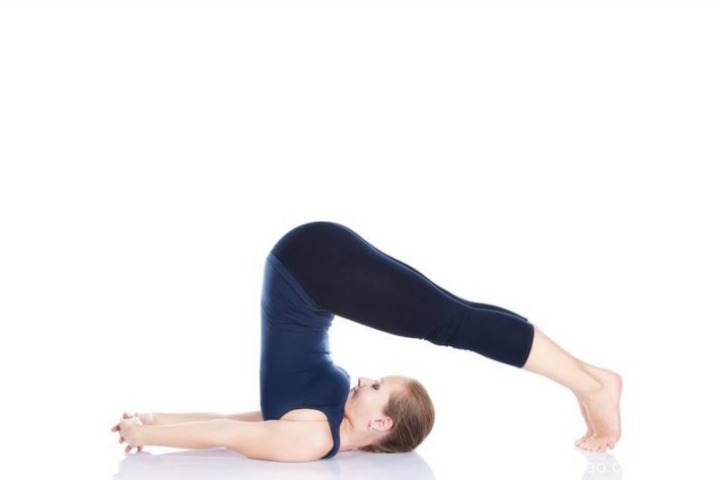
8.”Viparitta dhanurasana” (“Plow Pose”)
Procedure:
- Lie down on your back then lift your legs up straight by bringing heels together.
- Take your hands up through sidesslowly across the spine, leading to foot.
- As a result, the foot should rest on the center of the palms.Lock the foot in this position, clutching their fingers.
- The neck and shoulders should be comfortable.
- If there is any discomfort gently push the hips back.Make about 3-5 loops a day.
9. Variation “Urdhva mukha Paschimottanasana”
Procedure:
- Lie down on your back andLift your both legs and grab the toes with hands.
- The legs should be kept straight.
- If you feel a negative voltage or hamstring is tight enough or shoulders raised then use belt to keep them together.
- Avoid stress in back, shoulders and shoulder blades, it is advised to lie on the floor and Make 12 cycles of this asana.
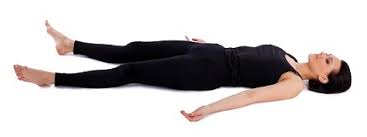
10. “Savasana” (“Dead Man’s Pose”)
Procedure:
- The final pose for any yoga workout.
- Lie back down on the floor facing towards sky.
- Spread the arms wide two sides individually below the shoulders, palms facing up.Spread your legs and Lay down in a most efficient manner.
- Close your eyes bylengthening your neck and lower the jaw slightly so that it will stay below the level of the forehead (if it is possible put a pillow). Stay in this position for few minutes.
Yoga is a healthier way of life. Make this yoga poses as part of your daily routine to stay flexible and healthier.
You Might Also Like:
- 11 Best Yoga Poses To Boost Your Energy
- Best Yoga Poses That Improve Your Sex Life
- Yoga for Hips – 10 Best Yoga Poses to Keep Your Hips Tight and Strong
- Yoga for Depression – 6 Effective Poses to Fight Depression
- Top 4 Yoga Poses to Improve Mental Health
- Yoga for Immunity: 5 Effective Yoga Poses To Boost Your Immune System
Images:- 1, 2, 3, 4, 5, 6, 7, 8, 9, 10
