Important: This article is for informational purposes only. Please read our full disclaimer for more details.
Getting rid of belly fat can be a daunting process. For some, the thought of going through exercise sets or diets can be a dull moment. An unhealthy lifestyle, poor diet, lack of exercise and stress does result in a flabby protruding gut during a period of time results. The very epitome of an unhealthy lifestyle and a friendly reminder from your body that it’s time to get something done about it.
Barely to we realize the negative consequences of tolerating a bigger belly. Other than the feelings of insecurity and a diminished physical appearance, belly fat increases the risks of heart disease, diabetes, and other ailments.
With the correct exercises and well-balanced schedule you too can begin the journey of a healthier, better looking and fit version of you. Introducing yoga, an easy and convenient way of getting the good calories burned and the excess fat out. With our list of top 13 yoga poses to reduce belly fat, you are on the track to your belly loss journey.
Why Use Yoga Poses?
During the years, yoga has been known as a therapeutic form of exercise that embodies the mind, body, and soul. In ancient China, the utilization of yoga was an everyday spiritual practice bringing wholeness to the body. It incorporates rhythmic bodily movements, this in itself triggers your metabolic system and gets the calories burning. Yoga poses offer a great alternative to gyming as it can be done anyway and anytime as well as increase your blood flow, stretch your muscle fibers and at the same time burns belly fat. It can be costly subscribing to an active gym membership plan, that’s where yoga poses come in.
How Do Yoga Poses Help?
Yoga poses offer a wide variety of natural benefits. With proper form and consistency, one can begin to notice the positive changes a healthy yoga lifestyle has on the body. Such benefits include:
- More control over body movements.
- It is also known to posses healing properties.
- An increase in flexibility.
- High muscle tone and definition.
- Reduction in overall body fat.
- A peaceful state of mind.
- Relaxed breathing patterns.
- Strengthens the heart.
- Increase blood circulation.
- Reduces the risk of diseases such as diabetes and high blood pressure.
What You Need to Begin Yoga Poses Today
The following are basic essentials to help kick start your journey today. Although not entirely a must, one can do without some of the requirements but to get more out of doing yoga poses, the following will really help.
- A comfortable yoga mat.preferably a material that will not cause irritations to the skin. Some react to PVC. Better alternatives include cotton or rubber.
- Sizeable room.
- Well balanced schedule.
- Water bottle to stay hydrated every now and then.
- Comfortable spandex attire to allow mobility and flexibility during those hard to reach poses.
[ Read: Yoga Poses to Relieve Lower Back Pain ]
Top 13 Yoga Poses to Reduce Belly Fat
1. Sun Salutation
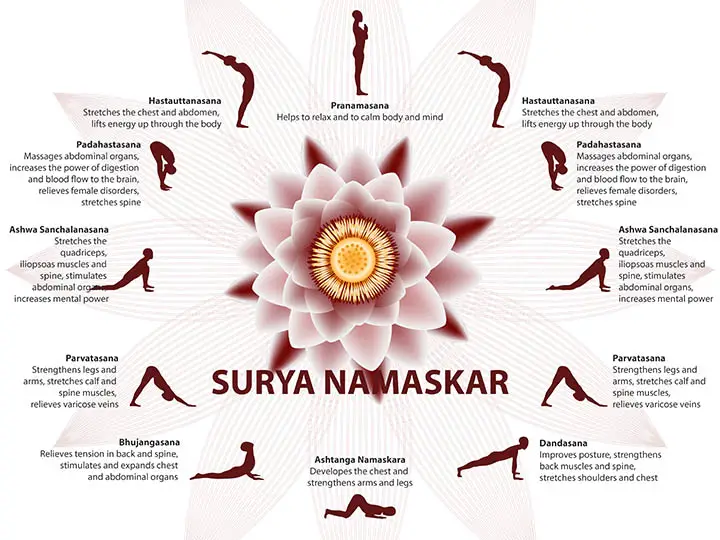
The Sun Salutation pose also known as the Surya Namaskar involves twelve yoga positions within one cycle. The pose gets its name from its early morning use whereby yoga meditators would perform the pose while facing the sun. Each position of the pose impacts the body, with the front and back bends stretching out the muscles fibers and bones while the more stationary ground laying and standing open up the channels of the lungs causing increased airflow into the body.
How to Do:
- Start by positioning yourself at the front edge of your mat. Then place your palms together in a prayer poses bringing it close to your chest.
- Take a deep breath while raising your hands above your head and stretching backward.
- Exhale and bend forward bringing your stretched arms to your feet.
- Inhale and lift your head looking forward as you begin to bring your fingertips to the floor.
- Breathe in as you place your right foot towards the back of the mat, leaning your left foot near your fingertips. This position is known as a lunge.
- Inhale and place your left foot to meet your right foot at that back of the mat. This is the plank position.
- Exhale and shift your weight forward, bending your arms into a press-up pose a few inches above the ground.
- Bend your elbows out breathe in and stretch backward pushing your spine to curve towards your lower back while your knees, legs, and hands are touching the ground.
- Exhale as you push your hips up while your hands are placed on the ground to form an inverted V formation (downward facing dog).
- Breathe in as you place your right foot towards your hands to perform a low lunge.
- While exhaling, slowly move your left foot forward meeting your right foot and bend over with your head close to your knees.
- Slowly breathe bringing your arms above your head as you lift upright
- exhale and return to beginning position.
Benefits: This pose stretches out all organs and body parts. It tremendously stretches out muscle tissue and realigns bone ligaments giving a satisfying full body stretch.
[ Read: Yoga Poses for Back Pain Relief ]
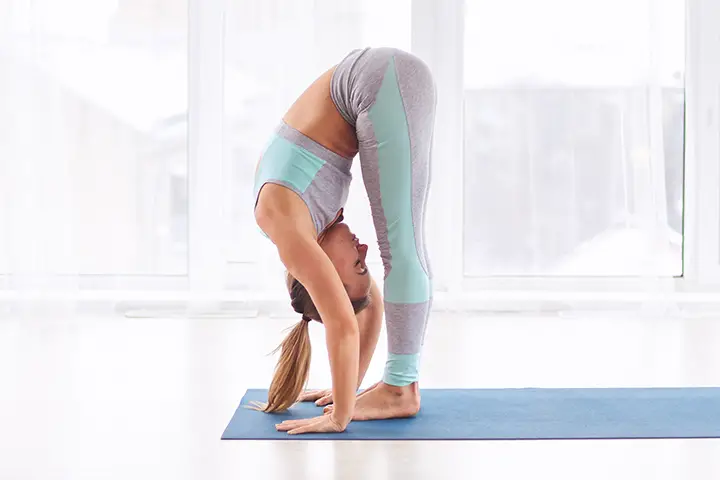
2. Standing Forward Bend
This pose helps isolate the belly region and targets the belly fat by compressing the abdomen as you stretch forward. In this state, the fat burning metabolic mechainis are triggered.
How to Do:
- Start off above your mat while in a mountain pose
- Inhale as you raise your hands up while rotating your triceps towards the front.
- Exhale as you reach for the floor
- Slowly bend your knees and fold your upper torso over your legs.
- Begin to place your fingertips onto the ground near your feet.
- Inhale and hold your breath tucking in your stomach and hold for 60 seconds.
- Exhale and lift your body forward into the Tadasana position to finish the pose.
- Repeat for a number of reps desired with an interval of 10 to 20 seconds between sets.
Benefits:
- Works on the appetite.
- Improves digestion.
- Tightens and tones abdominal muscles.
[ Read: Yoga Poses To Boost Your Energy ]
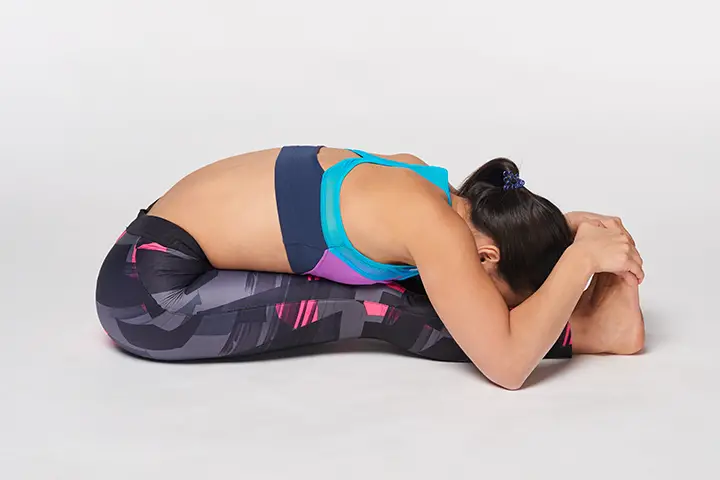
3. Seated Forward Bend
The seated forward pose helps align and tone the back as well as the tummy and solar plexus. Muscles in areas such as thighs and hips are also stimulated.
How to Do:
- Sit on your mat while in the Padmasana position.
- Point feet towards the ceiling while keeping your spine straight.
- Without bending your elbow, inhale deeply and stretch your hands above your head as far as you can.
- With your head resting on your knees, exhale and bend forward bringing your hands down and grab your toes.
- While grabbing your touches, pull them back stretching out your hamstring and spine.
- In this position, breathe in and hold for a good 60 seconds.
- Exhale as you gently release from this pose, bringing your body forward and back to the Padmasana pose.
- Repeat at least 10 times.
Benefits:
- Targets belly fat.
- Stretches hamstrings.
- Releases stress.
[ Read: Benefits of Bikram Yoga ]
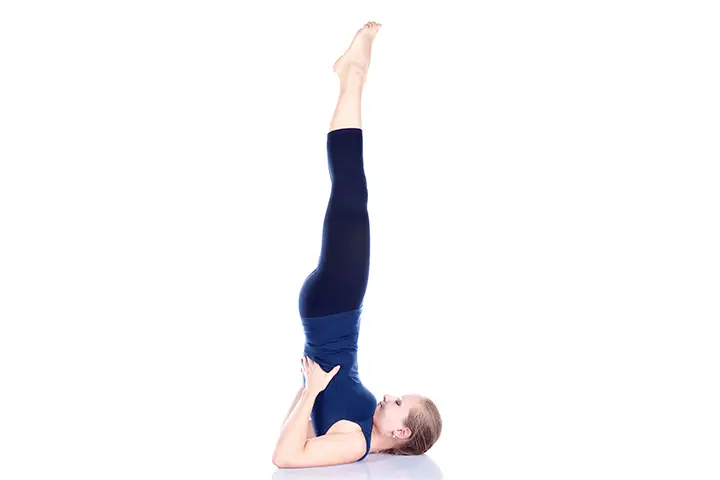
4. Shoulder Stand
This dynamic power pose stimulates the thyroid gland and helps residual relive stress in the body. if you have neck issues, then this poses help relieve the pain.
How to Do:
- -Start off in a plow pose, bringing your hands towards your back with your fingers facing up. place your hand near the mid back and elbows bent.
- Lift your feet towards the ceiling as you inhale. Look forward to prevent strain on your neck or any injuries.
- Allow your feet to slowly fall back behind you and retain this position. Leave arms touching the ground.
- Push feet to reach the ground behind and hold the position for a few seconds. clasp hands together and breathe out.
- Inhale and gently place knees to the head and arms to support the lower back.
- Exhale and begin to shoot legs upwards toward the ceiling and hold the position with arms still supporting the back.
- Slowly lower into plow pose and repeat.
Benefits:
- Relieves neck tension
- Works on spin
- Stretches legs
- Works on abdominal muscles
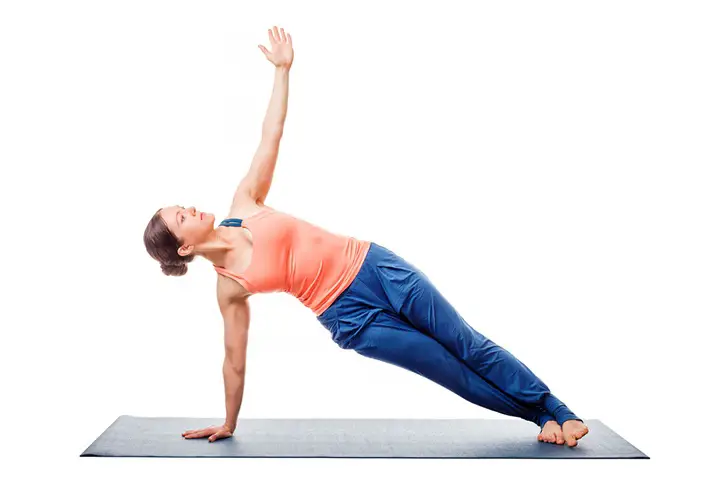
5. Vasisthasana
The Vasisthasana pose provides a variety of benefits to the body. The pose should be performed on an empty stomach.
How to Do:
- Start off in a plank position
- Gently begin to shift your weight onto the right side of your body.
- Rest your left arm against your hip and left foot on top of the right foot.
- Place your right arm above your shoulder slightly ensuring your palm rests against the floor.
- Inhale and raise your left arm forward, with your fingers towards the ceiling.
- Hold this pose and gaze at your hand and fingers
- Gently rest your arm onto your hip as you exhale and release this position.
- Return to the plank pose and repeat, switching onto your left side.
Benefits:
- Strengthens arms and legs.
- Works on the abdomen.
- Improves balance.
- Stretches back and legs.
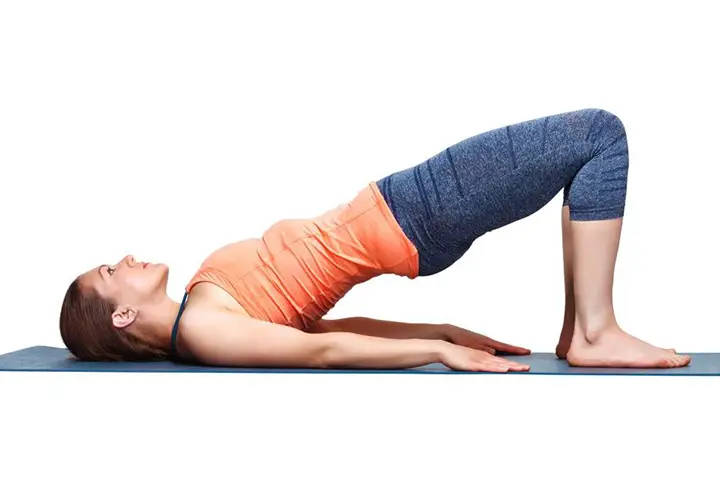
6. Setu Bandha Sarvangasana
Also known as the bridge pose, the Setu Bandha Sarvangasana relaxes the whole body fully and stretches your back, legs, and arms quite well. relieving any muscle tension.
How to Do:
- To start off, lie flat on your back onto of your mat
- Place your feet on the floor as your bend your knees shoulder-width apart. ensure ankles and knees are straight.
- While inhaling, gently begin to lift your back off the floor. tuck shoulders in and ensures chin is in contact with your chest.
- Squeeze your lower back and buttocks to build up the pressure
- Stretch hands towards feet and push firmly onto the ground, arching your back higher with your head still in contact with the floor
- Exhale and repeat.
Benefits:
- Opens up the lungs and improves breathing.
- Helps relieve menstrual pain.
- Aid relieve high blood pressure.
- Calming effect.
- Improved blood circulation.
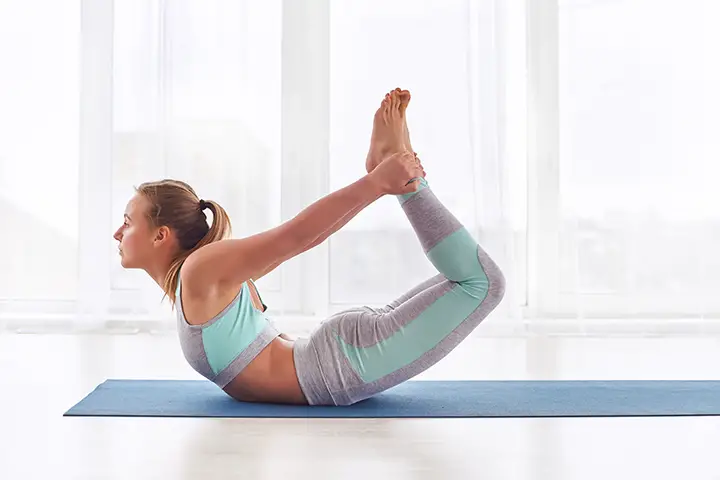
7. Bow Pose
The bow pose offers a good stretch to the abdominal muscle and tones the muscles firmly. The pose improves generally posture as well as improve chest, legs, arms and tummy tone.
How to Do:
- Lie down onto the mat and get into the prone position with your legs together
- Rest your hands on any side of your body and place your palms onto the ground
- Bend knees upwards as your exhale
- Begin to lift your head upwards and slow bend backward like an arch
- With your hand’s placed backward, reach out and grab onto your ankle
- Inhale deeply with your body weight shifted to your abdomen, begin to lift knees further up
- Hold the position for 30 seconds and breathe normally
- Exhale as you slowly relax the body
- Repeat pose 10 times with a 15-second break in between.
Benefits:
- Improvement in posture.
- Back muscles and abdomen stretch.
- Neck pain relief.
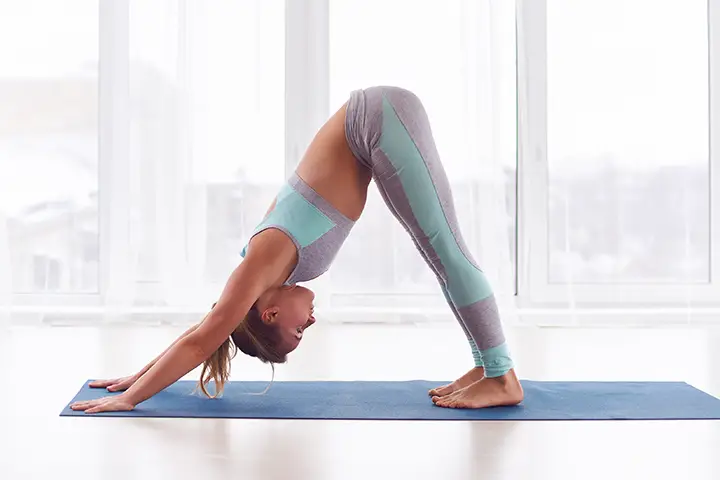
8. Adho Mukha Svanasana
The Adho Mukha Svanasana is also termed the “downward facing dog pose” due to its striking resemblance to its animal counterpart positions. It’s an easy pose for beginners and gets that fat burning process on the go.
How to Do:
- To begin, stand on all fours onto of your mat
- Straighten your elbows and knees as you exhale out.
- Retain the inverted v position
- Ensure hands are aligned to shoulders and feet aligned to hips.this keeps the posture in a good position.
- While pushing your hands firmly to the ground, place your ears against your inner arms and stretch neck forward
- Hold the position for a few seconds and repeat.
Benefits:
- Improves blood circulation.
- Works on the digestive system.
- Helps tighten abdominal muscles.
- Tones the hands as well as the feet.
- Help reduce stress and anxiety.
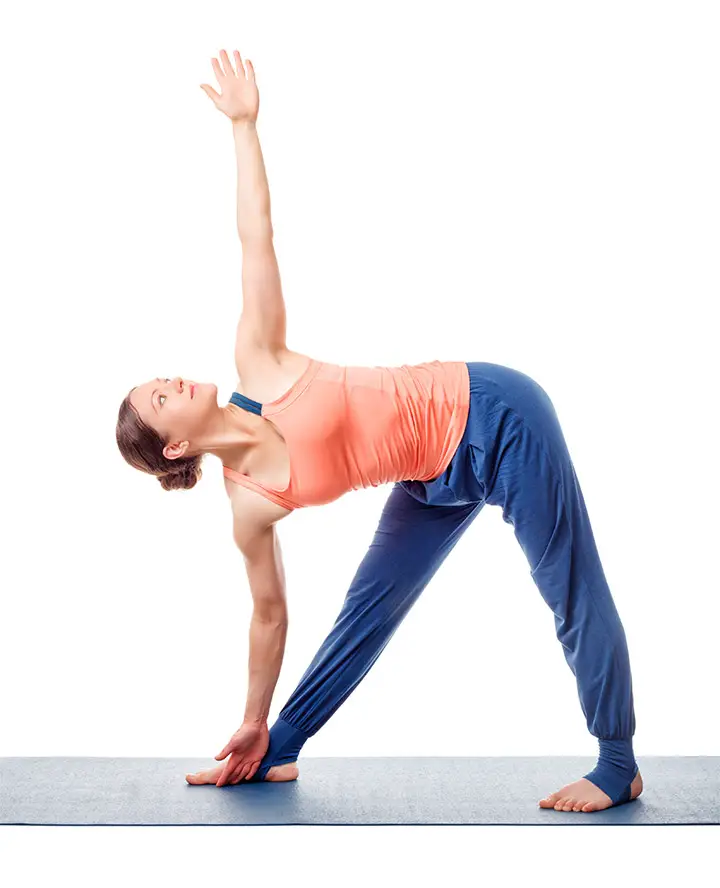
9. Trikonasana
This dynamic yoga pose resembles the triangle. This is due to the posture form involved in the routine. It also requires one to keep their eyes open to maintain balance and not topple over.
How to Do:
- Stand upward on your mat and place legs roughly four or three feet apart from each other and arms shoulder-width apart.
- Place right foot outside and at 90 degrees while left foot is placed at 15 degrees
- Place the heel on the right foot at the center of the arch between the left foot and inhale
- As you exhale, from below your hips, bend your body to the right while ensuring that your waist is straight.
- Place your right hand to the ground behind your right foot while lifting your left hand upwards forming a straight diagonal line
- Hold the position for a few seconds
- Slowly exhale and return to starting position
- Repeat
Benefits:
- Completely stretches out groin area, hips, pelvis, hamstrings, and calves.
- Works on chest and abs
- Stimulated abdominal organs
- Reduces back pain
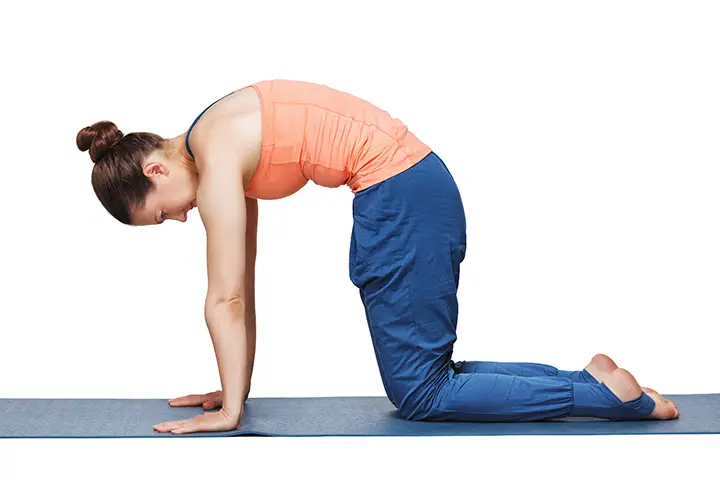
10. Cat Pose
The cat pose offers a gentle stretch to the back, spine and belly regions. it’s a simple to do pose with good benefits and awesome feeling.
How to Do:
- Begin with hands and knees in tabletop position, ensure knees are below hips and elbows, shoulders and wrist are aligned. keep hands and knees on the ground.
- Exhale and arch back towards the ceiling while retaining your arms and knees posture.
- Inhale and return to tabletop position
- Repeat as often as can manage
Benefits:
- Stretches spine.
- Neck pain relief.
- Works on wrists.
- Strengthens forearms.
- Stress reliever.
- Opens up air channels.
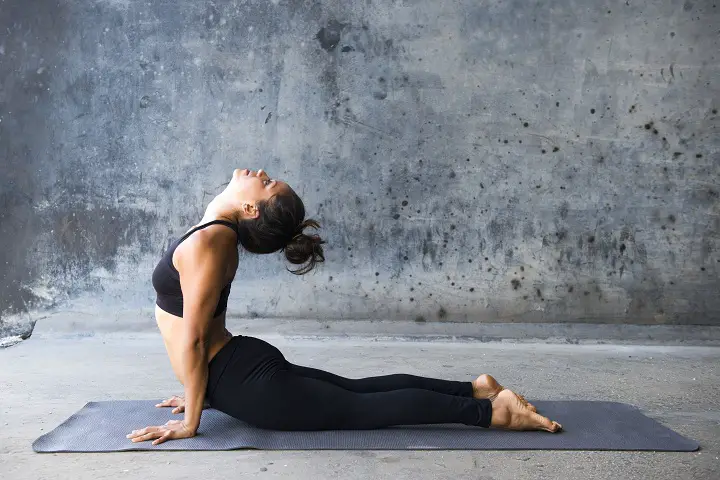
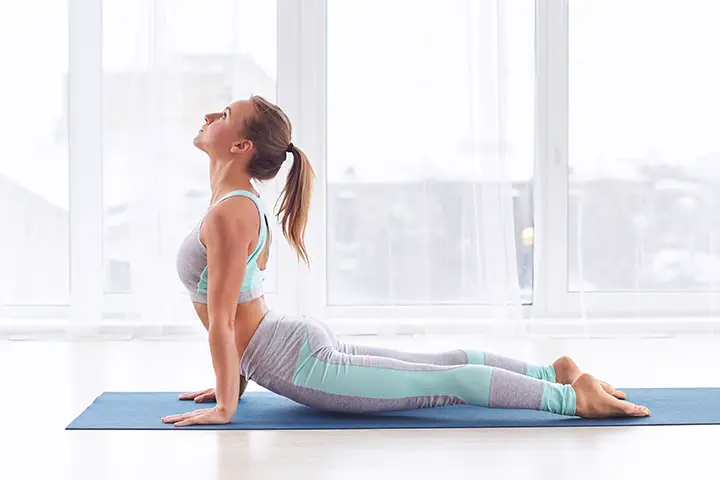
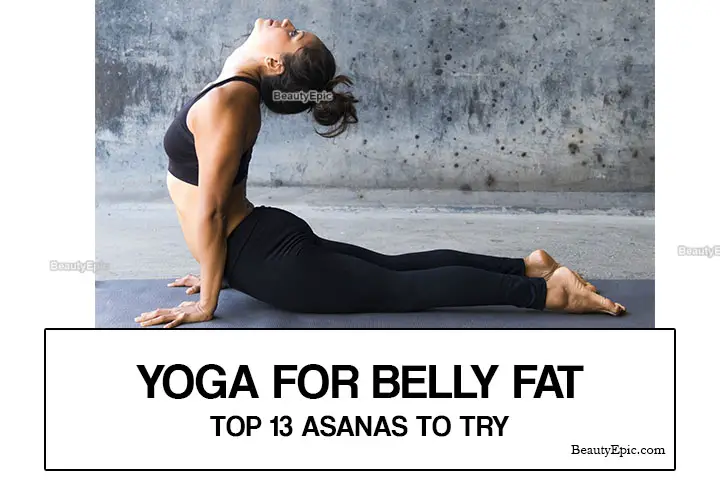
11. Cobra Pose
Experience a well stretched back with the cobra pose. resembling the posture of a cobra on defense, this asana helps in burning stubborn belly fat and stretching the back muscles and spine.
How to Do:
- Begin in a “prone position” on your mat
- Place palms on the ground with arms on either side of the body
- Slowly brings the palsm to underneath our shoulders
- Gently lift your head and chest off the floor inhaling deeply with your gaze to the roof.
- Tuck in your pubis and keep your buttock firmly squeezed in
- Hold the position for 30 seconds and breath regularly
- Bend backward as much as possible while bringing your waist and take a deep breath
- Hold the posture for 30seconds
- Exhale and bring the body down and into the prone position
- Repeat
Benefits:
- Stretches muscles located in the shoulders, back and abs.
- Reduces stiffness in the lower back.
- Improves flexibility.
- Elevated the mood.
- Boosts heart.
- Tones buttocks and abs.
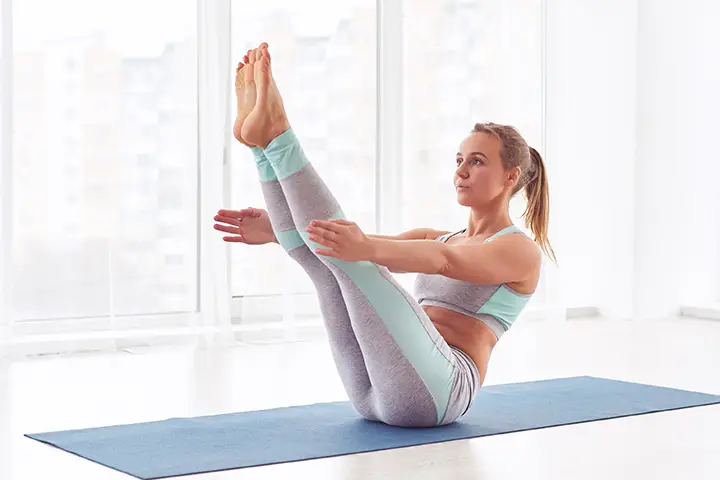
12. Boat Pose
The boat pose offers a powerful abdominal workout with guaranteed results with consistency and patience. Out of all the poses listed, the boat pose can be considered the highest effective pose among the Top 13 Yoga Poses to Reduce Belly Fat.
How to Do:
- In the “Supine position”, lie down on your mat with legs stretched out and toes facing the roof. Place palms on the ground facing on either side.
- Inhale deeply
- Lift the body off the ground and exhale
- Stretch arms to fit parallel to legs
- Ensure fingers are aligned to toes and gaze on them
- Hold the position and notice the clenching of abs.this shows its effectiveness
- Continue to hold the position for 30 to 60 seconds while breathing
- Return to “supine position ” and repeat
Benefits:
- Greatly strengthens abdominal muscles.
- Works effectively on reducing belly fat.
- Builds arms and shoulders.
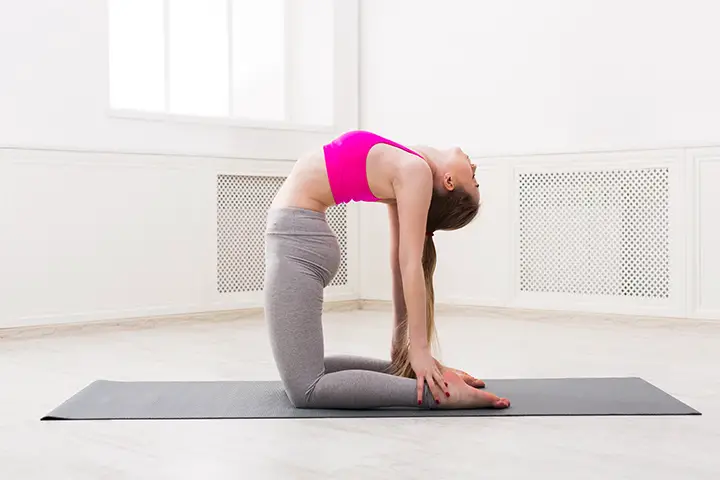
13. Camel Pose
The camel pose is a back stretching pose that consists of mainly backward arching postures. it tones on abs and gives out a good back stretch releasing any tension.
How to Do:
- Start off by sitting on your mat and entering the “Vajrasana” position.
- Support your body weight onto your knees by gently lifting your body from your knees
- Ensure heels of feet are perpendicular to the ground
- Arch back and exhale deeply
- Move hands from behind your body and grab onto ankles or close if possible
- Tilt head back and arch backward, stretching spine.
- Hold the posture for 30 seconds
- Exhale and relax
- Return to beginning posture and repeat
Benefits:
- Improves body posture.
- Relieves fatigue and muscle tension.
- Strengthens back muscles.
To conclude, ensure that you get adequate nutritional support such as staying hydrated by drinking plenty of water and eating the right kinds of food. Avoid junk foods and processed things and you’ll begin to see quicker results in no time. When it comes to selecting any of our Top 13 Yoga Poses to Reduce Belly Fat, choose the one that’s comfortable to you. We wish you success on your fitness endeavor and hope to see the gains soon.
Best Yoga Accessories
You Might Also Like:
- How to Get Rid of Back Fat?
- 6 Best Exercises to Get Rid of Bra Fat
- How to Lose Arm Fat?
- Best Kettlebell Workouts to Blast Belly Fat
- The 6 Best Plank Exercises to Lose Belly Fat
- How to Lose Belly Fat After 40 – 8 Easy Ways
- Flatten Your Belly After 50: Effective Exercises to Shed Fat
- How To Lose Belly Fat In A Week?
- Top 5 Exercises to Lose Thigh Fat
- Slim Your Thighs with 5 Easy Yoga Poses
- 6 Best Yoga Poses to Reduce Arm Fat and Build Muscle
- Yoga for Back Fat
- Benefits of Deep Breathing
- Oziva Superfood Plant Protein For Everyday Fitness
